

1. Add VIN Criteria
VIN calculation is based on the information you enter in the VIN Criteria section.
Follow these steps:
-
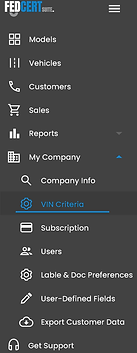
Go to My Company → VIN Criteria.
-
Add each required field using either the Quick Add button or the Add button to enter them manually.
-
Once all fields are complete, go to Reports → VIN Calculation.
-
Print and mail the VIN Calculation report to NHTSA.
The VIN Criteria must be submitted to NHTSA 60 days before the sale of your first vehicle.

2. Add Users
-
Go to My Company → Users.
-
Add each new user and enter their account information.
-
Assign roles based on the permissions each user needs:
-
Software Access – Allows the user to access FedCert Suite software.
Vehicle Edit – Allows the user to add and edit vehicles.
Sale Edit – Allows the user to add and edit sales.
Admin Menu Access – Allows the user to access administrative functions located under the company name.
3. Label & Doc Preferences
-
Go to My Company → Label & Doc Preferences.
-
On the top portion of the screen, enable or disable labels. Only enabled labels will appear when creating models or printing.
-
To print company information on the Manufacturer’s Certificate of Origin, set Print Company Name, City, and State to On. This will include the information on the MSO.
-
Add Logo Graphic, Signature Graphic, and Warranty Graphic in the specified dimensions. Make sure the images meet the recommended size requirements for best results.
4. Create Models
Models are templates designed for easy vehicle creation and are based on the information entered in VIN Criteria.
-
Go to Models → Add button.
-
In the Create Model screen, enter the desired information. Required fields are marked with a red asterisk.
-
Click Save to create the model.
5. Create Vehicles
-
Go to Vehicles → Add button.
-
Choose a Model Template previously created or Choose Empty Template.
-
The Empty Template allows for items to be selected manually from the VIN Criteria.
-
Once the desired information is entered, select Save.
-
The system automatically calculates the check digit and goes back to the Vehicles screen.
6. Print Federal Cert. & Tire Placard
-
On the right-hand side of the screen, choose Actions→ Print.
-
Choose the label template and what label to start with, then fill in desired quantities.
-
When ready, hit Print. This will then download a PDF to view for printing.
NOTE: Be sure to use Adobe. Avoid printing through a browser extension.
7. Add Customers
-
Go to Customers → Add button
-
Fill in the required fields and desired information. Select Save.
-
Once the customer is saved, add the customer address. The address can be set to Billing, Shipping, or both.
-
Set the address as Active and Default.
8. Create a Sale
-
Go to Sales → Add button
-
Fill out the required fields. Date of sale, customer number, and delivery address are required. You will be able to search for a previously created customer and use that information.
-
After a sale is created, you can go to Actions → Print MSO.
-
Preview the document and then create a PDF for printing.